Here's my mock up of the top with the fabric I have:

Pretty sure there might have been some "shopping juice" involved in this purchase! However, the colors match the grey and black I have for pants and a skirt... so I'm going for it anyway.
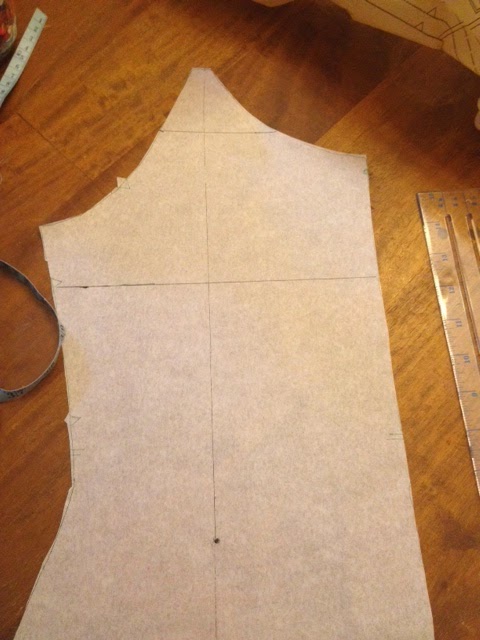
Step one: Laying out the pattern and doing a full-bust adjustment. Piece 1 is the front, which is cut on the fold and does not have a dart. So, where to start the fba? I learned something! It turns out on some patterns, this line is marked on the pattern.

To find the other line, make a horizontal line 1/2 way between the arm scythe notch and the shoulder seam. (In this case, there was no shoulder seam due to raglan sleeves. I went ahead and split the difference between the notch and the top of the front piece.) You can just see where I made a small mark at the 2 inch mark.

I then drew a horizontal line at this mark. Using the fold line to make sure it was square.

Then, I drew another horizontal line at the bust marking.

Next, I drew a vertical (grainline) line from about where my bust point would be to the hem line. (How did I know?? I measured my bust spread from my center front, and used this to find a close approximation.)
Now I cut, kind of like with a regular FBA, but no tilting.

Notice that the piece with the neckline is still attached at the first horizontal line. In order to allow for more bust wiggle room, I first scooted the arm scythe piece out 5/8". I have heard not to adjust more than this. I am a D cup but I still only adjusted 5/8".

Once this was adjusted (and taped...) I moved the front center piece down 1 1/2 inches.

All these pieces were taped down. (I'm just using parchment paper here, no fancy pattern cutting paper.) Next, I used a french curve to redraw the arm curve.

And extended the side seam from the new position to the hem.
(sorry, no pic)... I also curved the bottom from the side to the center front.
Then I used this new pattern piece to cut the front. That extra length in the front and the new line at the arm both caused a small problem later!
MaryKay is slowly trying to dig herself out from under a mountain if fabric, one tutorial at a time.
No comments:
Post a Comment